Categories
Tree Planting

Ontario Tree Planting Tips: Why You Should Plant Trees in the Fall

Table of Contents

Everyone knows it is a great time to plant in the spring, but did you know that fall is a great time to plant in Ontario, as well? 

In fact, for trees and shrubs, fall is a more ideal time to plant. 

Read on to find out why you want to plant trees in the fall and the best way to maintain your newly planted trees and shrubs.

When is the best time to plant trees in Ontario?

The best time to plant varies from region to region. 

In temperate or moderate locations where the weather is consistent year-round, there may not be a preferred time to plant, and you can at any time. 

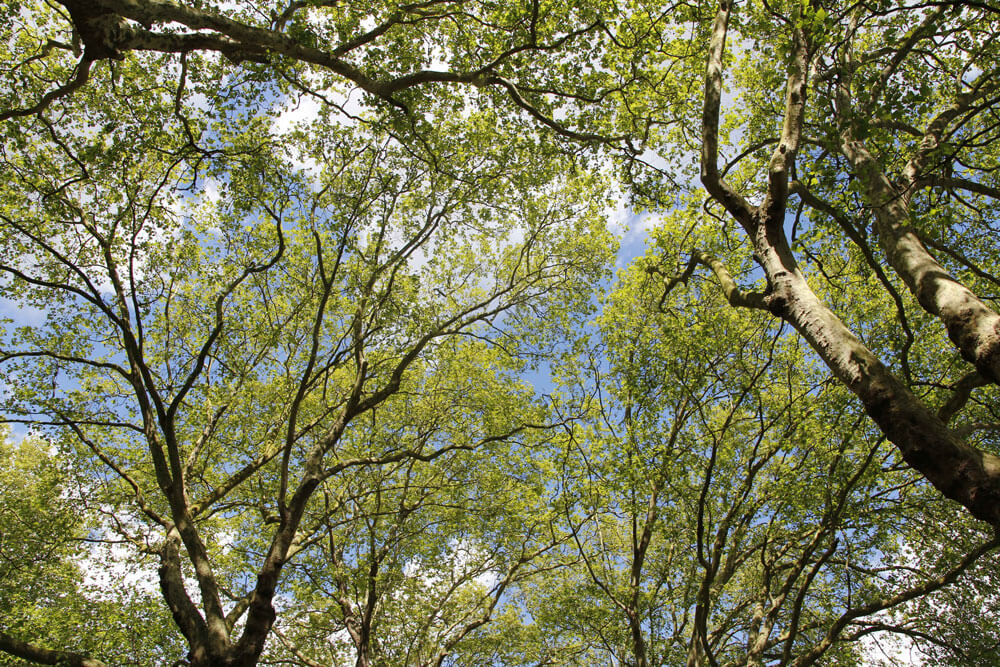
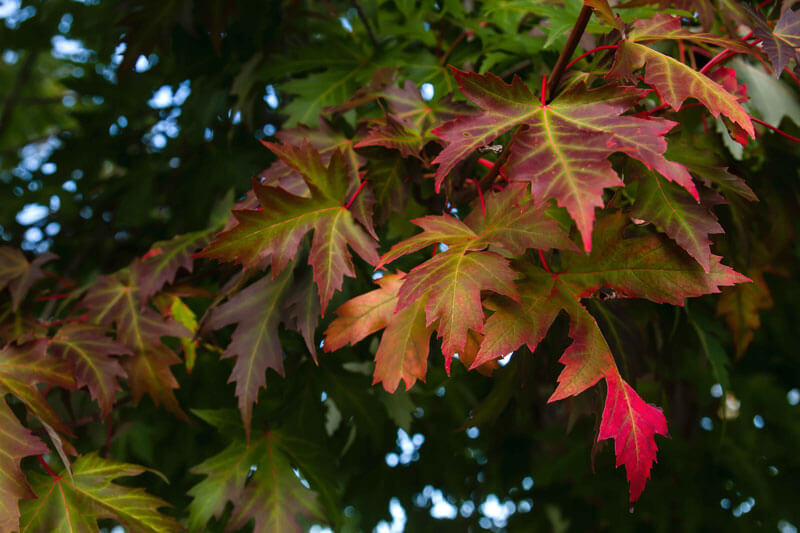
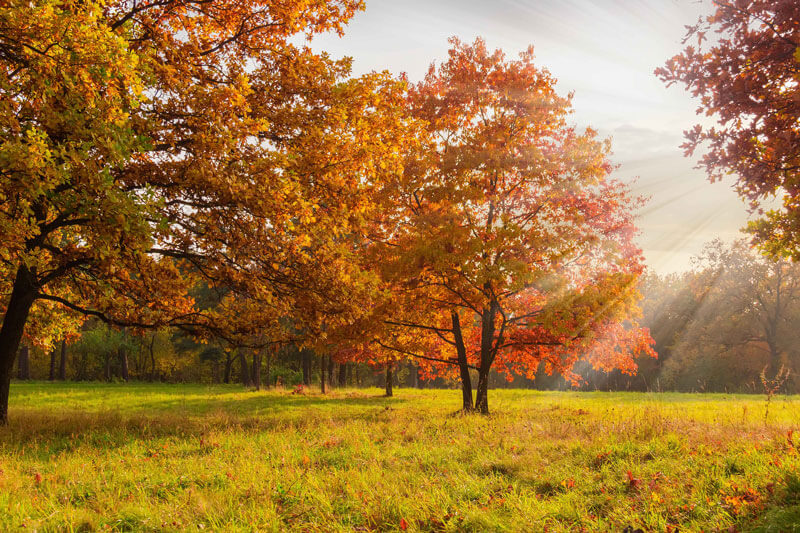
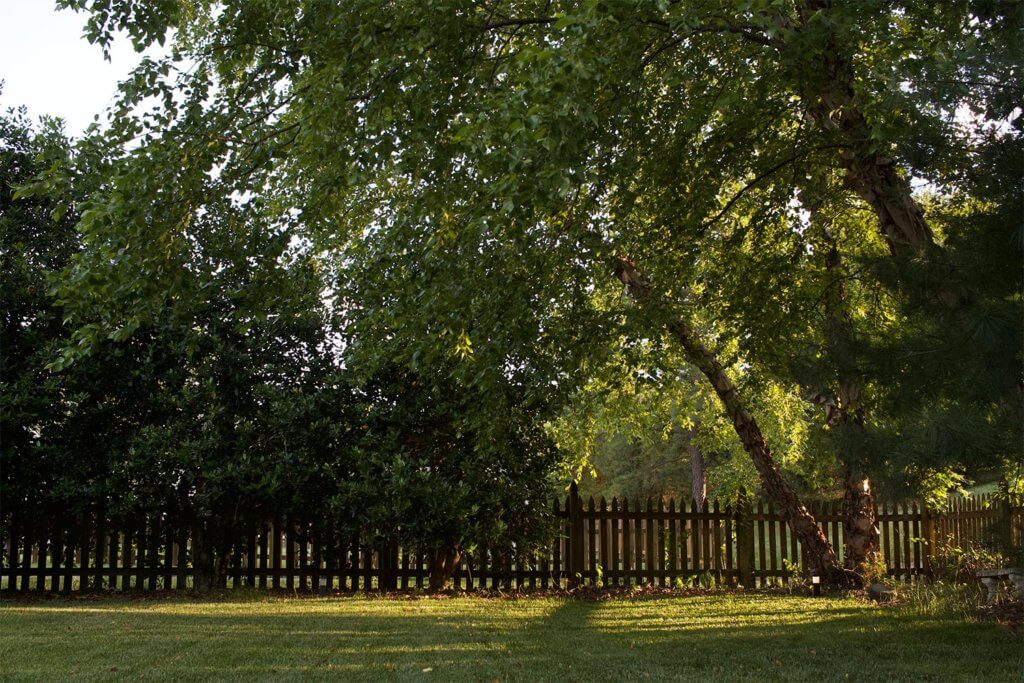
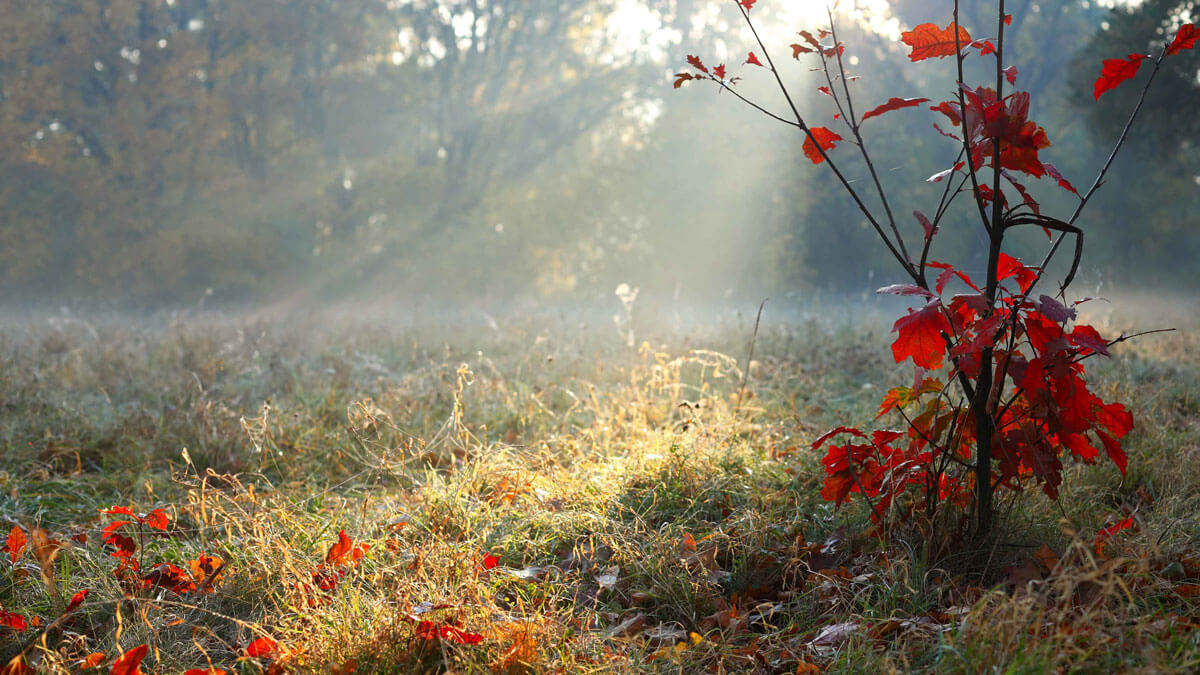
For many areas, like Ontario, that experience four distinct seasons, fall is a better time to plant your trees and shrubs. 

Plant your trees any time from the end of August to mid-October – sometimes even later is okay. 

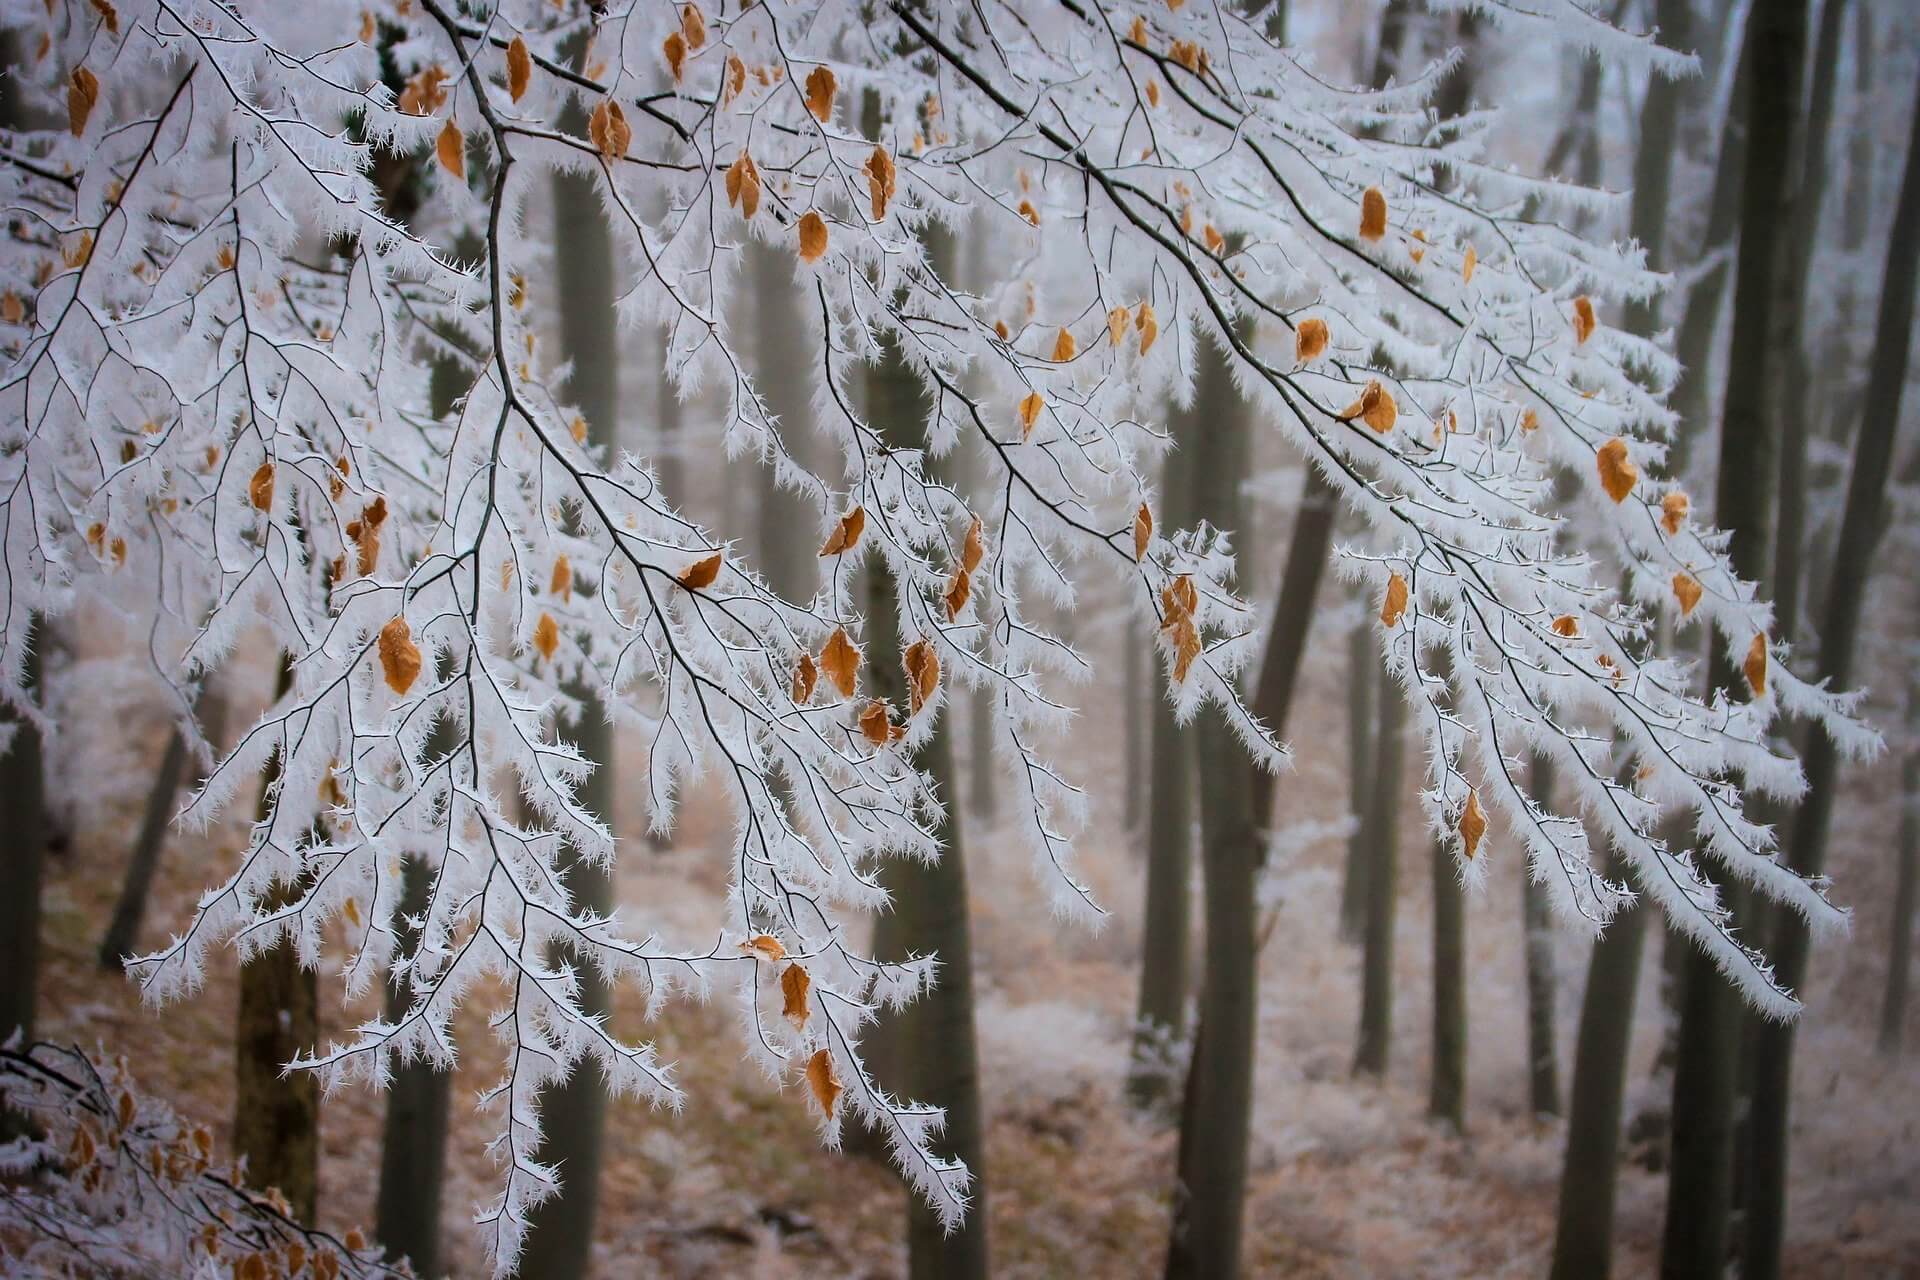
It’s safe to plant trees until the ground is frozen solid, generally after the first hard frost. 

Even if there is snow on the ground, if you’re able to stick a spade into the soil, it’s still okay to plant.

Benefits of fall planting

Planting them in the fall gives your tree an extra growing season before the stress of summer. 

It gives your tree time to establish its root system in the still-warm soil while not having to focus on providing energy to the new growth that comes in the spring.

As summer ends and fall begins, the soil temperature remains warm longer than you think. Trees love the warm soil as the air gets cooler. It reduces water loss and helps with transplant shock. 

As the weather cools further, trees move into their dormant phase. They can focus all of their energy on growing roots and preparing for the winter ahead. 

Many people fear that young trees can’t withstand the winter. Fortunately, that is not true.

Trees go dormant in the winter, which is the equivalent of going into hibernation. 

It slows down the tree’s growth, energy consumption, and metabolism. 

When trees are dormant, they shouldn’t require any extra care.

person canoeing on a water course on a fall setting with red and yellowing trees

Planting trees in the spring

Spring planting is not as great a time to plant new trees because the wet soil makes it harder for the tree to root and take hold. Trees and shrubs prefer dryer ground to properly roots.

Note: There are some exceptions to this rule. Contact a professional arborist or properly research your tree before planting. 

You can still plant trees in the spring. Just know that they will take a little extra care, like extra watering, to get established.

When planting trees in the spring, trees split their energy between growing roots and putting out new buds and leaves. 

Spring also brings rapidly rising temperatures, increasing water loss from evaporation, and the threat of a drought in the summer.

Steps to plant trees in the fall

Minimize stress to your trees

When transporting your new tree from the nursery, make sure to protect it by padding the trunk and branches with burlap and tie the loose ends with rope. 

Plant as soon as possible, but if planting right away is not possible, store the tree in a cool, shaded area. Water the tree as needed to keep the roots and soil moist. 

Carefully plant your tree

As mentioned above, plant the tree or shrub vertically with the root collar slightly exposed. 

Fill the hole in around the root ball. You can either use the native soil that you dug up or buy good quality soil to supplement the nutrients in your soil. Make sure not to include any grass or sod in the soil. 

Gently pack the dirt around the root ball until it is two-thirds full to ensure no air pockets. 

Fill the remaining space with water to further pack the soil and allow the hole to drain properly. Finish filling the hole and make a barrier of soil around the root ball to direct water towards the roots. 

Water your newly planted tree immediately after planting.

Maintaining your trees

Your tree requires the same care no matter the time of year that you plant. 

  • Always ring your tree with about 5 cm of mulch around the base of your tree. Give your tree some room and leave a couple of centimeters in between the mulch and the trunk. 
  • Water your tree when the soil and mulch are dry. Dig a three cm hole in the ground- if moist to the touch, do not water. If it is dry, give it a drink. 
  • Watering and care schedules vary by the tree. Get help by contacting an arborist to learn how to best maintain your tree.

How to prepare your trees for winter

  • Wrap your trunk. Some trees are susceptible to frost cracks because of dramatic temperature changes. To prevent damage, wrap the trunks of younger trees up to the first branches and leave the wrap on until April. Use commercial tree wrap for best results. 
  • Mulch the base of your tree with wood chips, bark, or other organic matter to reduce soil evaporation and insulate against extreme temperatures. 
  • Recycle your leaves. Use as mulch at the base of your trees or blend them into the yard with a mulching mower so the soil can absorb the nutrients. 
  • Give your tree a soak. Before quitting watering for the winter, water the soil around your trees. Start at the base of the trunk and water to the diameter of the longest branches. Water slowly and thoroughly. 
  • A young tree requires the most attention. 
  • Wait to prune until the winter. Dormancy, especially in late winter, is a great time to prune your trees.

Tree Specialists

At Nature’s Shade, we know what’s best for trees, including how to best plant trees in the fall. 

We will work with you to develop the best care plans for your newly planted trees and shrubs, ensuring the health, safety, and appearance of your landscape for years to come.

Visit our website or give us a call and request a FREE quote today!

Categories
Tree Planting

The Best Trees for Your Yard: Five Fast Growing Trees in Ontario, Canada

Today, some of the most popular trees planted are fast-growing, and for many great reasons! 

Some trees can take decades to mature or show substantial growth, while fast-growing trees can grow a considerable amount in a short time. They allow homeowners to appreciate the benefits of a mature tree sooner. 

If you want shade, privacy, or added beauty for your landscape quickly, a fast growing tree is perfect for your property. 

In Ontario, Canada, fast-growing native trees are ideal and recommended. They are perfectly adapted to the local environmental conditions, wildlife, and geography, which means they do not need much care to survive and thrive.  

Listed below are five fast growing trees in Ontario.

Table of Contents

Eastern White Pine (Native)

No tree represents Ontario more than the eastern white pine. It’s the provincial tree of Ontario! 

It grows in southeastern Canada and the eastern U.S and is commonly found as far north as Newfoundland and as far south as northern Georgia. 

These tall trees were highly valued and used to make masts for the British Royal Navy ships in colonial times.

If you plant it in direct sun, it grows quickly and is ideal for blocking any views or creating shade for your house.

If it’s exposed to a lot of wind, the eastern white pine grows crooked, with short, small branches on the side that faces the wind.

This fast growing evergreen tree has skinny needles that are 6cm to 12cm long and grow in bunches of five. The pine cones are 8cm to 20cm long and hang down from the branches. 

Its bark is dark greyish brown with broad, thick ridges.

Medium sized bright yellow pinecones and green pine needles growing on a pine tree

Growing Conditions:

Height: Up to 35m tall

Diameter: Up to 140cm wide

Growth: Up to 90cm a year

Life Span: 

Shade: Partial shade when young but prefers direct sunlight

Moisture: Tolerates a variety of moisture levels

Soil: Grows in any soil but prefers sand or sandy loam

Sycamore Tree (Native)

The sycamore tree is found naturally across southwestern Ontario and the Toronto area. It extends as far north as parts of Prince Edward Island. 

Sycamore trees grow to be one of the largest (height and width) broadleaf trees in eastern North America and thrive on rich floodplains. It is an excellent fast growing shade tree.

Like many willow species, this native tree has a shallow, fibrous root system that can hit septic beds and sewage pipes if it is searching for water. It is important to give them plenty of space to grow to prevent property damage.

The signature patchwork bark of the beautiful sycamore tree flakes off to reveal its white, green, and cream-coloured inner bark. It has large leaves similar to the maple leaf, and its fruits are firm ball-like groups of hairy seeds.

Big mature tree with brown branches and green leaves

Growing Conditions:

Height: Up to 35m tall

Diameter: Up to 200cm wide

Growth: Up to 60cm a year

Life span: Long living- more than 250 years

Shade: part shade or full sun

Moisture: Prefers moist soil

Soil: Rich soil

Tulip Tree (Native)

The tulip tree is Canada’s tallest deciduous tree. It grows in eastern North America, extending into Canada in southwestern Ontario and south into central Florida and Louisiana.

The ornamental tree is highly adaptable and can withstand Canada’s cold winters and Florida’s subtropical summers. 

The tulip tree is a large, fast-growing tree in both height and width with wide-spread roots.

The bark is brownish-green and smooth when young and turns brown and becomes grooved as it matures. The foliage is dark green with a whitish blue underside and grows up to six inches long.

As the name implies, once this native tree is mature (12 -15 years), the tulip tree produces gorgeous yellow-green tulip-shaped flowers which bloom during late spring or summer. The flowers have six petals and are 7-12 cm long. 

The seeds of the tulip tree grow every year and are a source of food for birds and small mammals.

Yellow tulip flowers with a tint of orange growing on a tall tree with green leaves

Growing Conditions:

Height: Up to 30m tall

Diameter: up to 100 cm wide

Growth: Up to 60cm a year

Life Span: Around 250 years

Shade: Full sun

Moisture: Lot of moisture during summer

Soil: Sandy or sandy loam

Silver Maple (Native)

The silver maple is a native species that grows in Eastern North America as far north as central Ontario and south into Florida.

It grows quickly and is often planted as a shade tree or for privacy. 

The silver maple is a large tree that needs plenty of room to grow.

It isn’t an ideal tree to plant next to city streets or houses due to the number of leaves that fall off in the autumn and wide growing roots that can clog sewer pipes.

Its light green leaves are 15cm to 20cm long, with 5 to 7 lobes. The silver maple is very similar to the red maple tree, except its leaves turn pale yellow or brown in the fall. 

The bark on the silver maple’s trunk is smooth and gray when the tree is young. The bark becomes dark reddish-brown as it matures and breaks into strips that peel off at either end. 

The trunks of silver maples can naturally become hollow, creating space for animals and birds to live in.

Brown and red maple leafs growing on a big tree

Causes & Symptoms:

Height: Up to 35m tall

Diameter: Over 100 cm wide

Growth: Around 60cm a year

Life Span: Up to 125 years in a non-urban setting

Shade: Full sun but tolerant to some shade

Moisture: Moist soil

Soil: Rich soil

Red Oak (Native)

Red oak, also known as the eastern red oak, grows well in Eastern North America. It grows in Nova Scotia down through Ontario and into the United States, spanning from Minnesota to Oklahoma and east to Arkansas.

The red oak is a native tree that is highly valued for its timber in Ontario. Its wood is very durable and is optimal for furniture, flooring, and millwork. 

It is a good street tree that tolerates pollution and compacted soil. It needs room to grow and doesn’t grow very well if it’s close to other trees.

The foliage of the red oak are dark green and have seven to eleven lobes and sharp, bristly tips. They turn a gorgeous red in the fall. 

The bark is grey and smooth when young and becomes fissured as the tree matures. 

The acorns can stay on the tree all year and are used as food by local wildlife in the winter. Sometimes dead leaves stay on the red oak, even in the winter.

Big thirty foot tall tree with bright orange and dark red coloured leaves

Growing Conditions:

Height: Up to 30m tall

Diameter: Up to 90cm wide

Growth: 60cm or more a year

Life Span: Longer than 200 years

Shade: Full sun but tolerant to some shade

Moisture: Tolerates a variety of moisture levels

Soil: Grows in a variety of soils

Tree Specialists

Now that you know five fast growing trees in Ontario, you can narrow down your favourites. 


Our team of tree professionals can carefully analyze all of your specific needs and recommend the best trees for your property. 


Call Nature’s Shade for professional help choosing and planting your next tree today!

Categories
Uncategorized

4 Common Tree Leaf Diseases and Steps To Fix Them (2021 Edition)

Whether in forests, lining the streets, or just in our backyards, Toronto is home to many different types of trees. Because of this variety, there are many diseases, pests, and invasive species that threaten the health of our trees. 

Unfortunately, leaf diseases are and always will be a fact of life for gardeners. Protect your plants by learning to recognize common symptoms and practice preventative matters to keep them healthy. 

Powdery Mildew

Powdery mildew is a common fungal disease for many tree species and is easily recognized. In Toronto, the Norway maple is the most common host of powdery mildew; however, the leaf disease can affect almost any deciduous tree species. This disease is cosmetic and doesn’t kill the tree.

Causes & Symptoms:

A variety of closely related fungal species cause powdery mildew; each species has a limited host range, meaning powdery mildew on one type of plant will not infect the other. Low moisture soil combined with high humidity provides optimal conditions for powdery mildew growth. 

The plant disease appears as a white to light grey powder on the upper surface of the leaves. It can also less commonly affect the underside of the leaves, stems, flowers, and fruits. Diseased leaves rapidly turn yellow, wither, and die.  

Occasionally, the powdery mildew kills off infected leaf tissue, creating a ‘shot-hole’ effect. The growth of the plant slows considerably, and the infected leaves slowly die back and drop off. 

Treatment & prevention:

As soon as you see the first signs of powdery mildew, it is important to prune and remove all infected parts of the plant. Pruning removes the powdery mildew spores and improves air circulation to help prevent an increase and spread in infection. 

When pruning the infected plant, try not to shake the branches too much; mildew spores can fall onto the healthy leaves. After each cut, disinfect your pruning tools and clean up fallen debris on the ground. 

Spores can also spread by rain or water splashes, so it is not a good idea to water your trees from above. Direct the water into the soil at the base of the plant. Drip irrigation and soaker hoses help keep the foliage dry and prevent the transfer of spores. 

Keep plants watered and maintain soil moisture around the root system by mulching plants early in the year. Powdery mildew thrives when the plant is not receiving enough water, and mulch helps retain water. Mulch also helps prevent any spores on the ground from splashing back up onto the leaves. 

To prevent powdery mildew, use a home remedy milk spray made with 40% milk and 60% water on a wide range of plants. You can spray plant leaves every 10-14 days to prevent further spread of the powdery mildew spores.

Downy Mildew

Downy mildews, unlike powdery mildew, thrives in cool, moist conditions and loves young, unhealthy, or stressed plants. Wet weather in Ontario means downy mildew can be incredibly detrimental to trees and plants like hops, potentially causing total crop loss.  

Causes & Symptoms:

Downy mildew affects a wide range of plants. It appears as yellow or white patches on the upper leaf surface and appears as light gray to purple downy growth on the underside of the plant leaf. 

Some downy mildew can cause the stems to turn yellow or prevent the plant from flowering altogether and cause crop failure.

Down mildew loves cool, moist weather generally found in early spring and late fall. Spore production occurs when temperatures are below 18˚C, and relative humidity approaches 100%. 

The downy masses are especially noticeable after rain or heavy humidity. As the leaf disease progresses, the leaves eventually turn brown and crispy and fall off. 

Downy mildew overwinters on plant debris and in the soil. Insects, wind, rain, or garden tools transfer the fungi to new plants.

Treatment & Prevention:

To treat downy mildew, remove and destroy all infected parts of the plant as soon as symptoms are seen- this includes any foliage on the ground. It is best to destroy the entirety of severely affected plants. Keep the ground under affected plants clean to prevent the disease from spreading.

Prune or stake trees and plants and remove any weeds to improve air circulation.

Watering in the early morning gives the plants time to dry out during the day. Watering plants in the evening leads to high humidity that persists throughout the night.

Downy mildew is relatively easy to control on most trees when you use a copper spray. Begin using the treatment two weeks before the disease generally appears or when in a long period of wet weather. Or you can begin treatment when the disease first appears and repeat at 7-10 day intervals as needed. 

To prevent downy mildew, avoid conditions the disease favours.

Since downy mildew likes moist conditions, avoid planting too densely and control weeds to provide good air circulation around the plants.

Rake leaves in autumn and remove them from the site to prevent the fungal infection from spreading to new plants the next growing season.

Apple Scab

Apple scab is a serious apple fungal disease that occurs every year in many parts of Canada, especially Ontario. In eastern Canada, apple scab is of economic importance. Severely infected trees become defoliated and the fruit non-marketable, decreasing chances of winter survival.

Causes & Symptoms:

Fungal disease development begins in the wet, cool weather (13˚C – 24˚C) found in spring and early summer. The fungi are carried by the wind, rain, or water splashes. During damp and rainy periods, new growth and leaves are highly susceptible to infection. The longer the leaves remain wet, the more severe the infection.

Apple scab symptoms begin as a small olive-green leaf spot. These spots can later darken to black. The infected leaves turn yellow, become distorted in shape, and drop early in the summer. 

Symptoms present on the fruit are similar to symptoms found on the leaves. They start as small, dark, raised areas that become large and corky. Infected fruit becomes distorted and may crack, allowing entry of secondary diseases and organisms. Severely affected fruits may become stunted and drop early in the summer. 

Treatment & Prevention:

Apple scab loves to overwinter in fallen leaves and soil. To treat apple scab, rake under trees and dispose of leaves and fruit in the fall; this helps reduce the number of fungal spores overwintering in the leaves and fruit and prevents the cycle from occurring again next spring.

Prune the tree to allow aeration, which helps the leaves dry quickly and prevents the spreading of apple scab.

Avoid overhead irrigation and water in the early morning hours to give the leaves time to dry out before infection can occur. 

Spread mulch or compost under the trees, keeping it away from the trunk to cover the soil and prevent the spreading of the fungal spores from water splashes. 

Rusts

Rust diseases attack a wide range of plants and are among the most dangerous fungus to attack food crops. Though each type of rust is specific to one plant or group of plants, they cause significant crop losses around Canada and worldwide each year. 

Certain types of plants are more susceptible to rust fungi than others: for example, irises, hollyhocks, and edibles like beans and leek. Occasionally, grass can become infected, but this is generally not a serious problem. 

Causes & Symptoms:

Rust spores prosper in a moist environment and produce extreme amounts of spores in a short period of time; they are wind-dispersed over a large area, infecting large areas quickly. 

Rust diseases cause the leaves to become distorted and the twigs to swell. Rust spots, which look similar to leaf spots, are called pustules. The pustules range from bright yellow to black in colour. The colour of the spots darkens as the plant disease matures and the seasons change. In extreme cases, the infected leaf withers and dies rapidly. 

The pustules are raised, and when rubbed with a cloth, a deposit the same colour as the pustule will be seen on the cloth. 

The presence of rust likely indicates an already weakened plant; it’s essential to check for other signs of diseases or infestations.

Treatment & Prevention:

Once established, rust can be one of the most challenging tree leaf diseases to control. To prevent rust from becoming established, keep trees well-watered and fertilized. Allow space between plants and trees to improve air circulation since rust thrives in damp conditions. 

Remove and destroy all leaves and plant parts infected with rust. Clear debris away from underneath plants affected or most likely to be affected by rust. 

Do not make the leaves into compost because the fungus overwinters on plant debris. If the plant is severely damaged, remove the entire plant to prevent them from infecting other plants of the same species. 

Professional Tree Pruning and Removal

At Nature’s Shade, we are here to help you take care of your trees. Tree preservation is a top priority; a little bit of prevention can mean saving the entire tree! 

Whether your tree is already infected and needs to be removed entirely, or you want to take preventative measures and clean up your trees for better circulation, Nature’s Shade professionals are trained in all things tree removal and pruning and will be there to help you from start to finish. 

Visit our website or give us a call and request a FREE quote today!

Categories
Uncategorized

How to Protect Your Trees from the Gypsy Moth in Ontario (2021 Edition)

The Gypsy Moth in Ontario is wreaking havoc throughout Ontario and Southern Canada. 

The infamous European gypsy moth caused nearly 590,000 hectares of defoliation in Ontario last year and is on track to cause significant damage in 2021. 

Where do Gypsy Moths Come From? 

Originating from Europe, gypsy moths (Lymantria dispar dispar or LDD moth) were introduced to North America in 1869 for possible silk production and are now a well-established invasive species decimating trees and forests across Southern Canada and the Eastern US.

Gypsy Moths arrived in Ontario around 50 years ago and haven’t left. 

Once established, the gypsy moth population fluctuates widely from year to year. Each population varies annually and fluctuates with local conditions. Years of inactivity can follow seasons with high numbers of caterpillars and heavy damage.

What Areas do They Affect?

Out of all of the stages of life, the gypsy moth caterpillar stage is arguably the worst; this is the only stage that the gypsy moth feeds. These hairy caterpillars have few natural predators and can coat a tree trunk and canopy so thick you can hear them. 

The gypsy moth caterpillar infests trees in woodland or suburban areas and prefers to defoliate particular species of trees, such as oak, poplar, willow, birch, and sugar maple. But, during outbreak years, the caterpillars may completely defoliate nearly any broadleaf tree. 

Impact of the Gypsy Moth in Ontario

As previously mentioned, the impact of gypsy moths change from year to year, and last year was a particularly rough year for Ontario; the area of trees completely decimated by gypsy moths was about the size of Prince Edward Island

Not only do gypsy moths affect our trees, but the hairs on their legs can also cause an allergic reaction in some people. Therefore, it is strongly advised to use caution when visiting or hiking in parks this summer. 

Gypsy moth caterpillars feed on approximately 500 different plants. Depending on population and age, caterpillars can chew small holes or completely strip the tree of all leaves. 

Older caterpillars sometimes eat certain species of hardwood that younger caterpillars generally avoid. But, interestingly, when food is scarce, the caterpillars will feed on almost any vegetation.  

Methods to Combat Gypsy Moths

photo of a gypsy moth during the infestation of gypsy moth in ontario

Keeping your trees healthy is key to them surviving gypsy moth infestations. Healthy trees are better able to ward off attacks.

Similar to other tree pests, the gypsy moth will defoliate an injured or stressed tree first. Stressed trees often have wounds or deep crevices in the bark that provide the egg mass and larvae with a shelter that aids in their survival. 

Preventative tips to reduce gypsy moth infestation in urban areas include:

  • Water trees during droughts
  • Protect the tree’s root zone
  • Place mulch around the base of the tree to increase soil moisture
  • Fertilize trees at appropriate times
  • Avoid injuring trees with lawnmowers or other damaging objects 

Preventative measures are no longer helpful once your tree has been affected by gypsy moths. Instead, homeowners can try methods such as:

Burlap Sacks

Placing a burlap band at chest level around the tree trunk, especially oaks, will catch caterpillars when they climb up and down the tree, looking for shade. This method also provides an easy way to monitor the gypsy moth population of your trees and yard. 

To make a burlap band, wrap and tie a strip of burlap about 30 cm wide around the trunk of the tree. The caterpillars come down the trunk to find shade during the daytime and get trapped in the burlap band. 

Check the burlap at least one to two times a day, pick off the caterpillars, and throw them into soapy water. When numbers are low, you can crush the larvae under the burlap. 

Sticky Substances

Another method to fight a gypsy moth outbreak is to wrap your tree in a sticky substance, like duct tape, to trap the caterpillars. Caterpillars crawling up the tree will get trapped in the sticky material and die. 

Make a band using duct tape and waterproof sticky material, such as petroleum jelly or Tanglefoot. 

Make sure the bark is dry before wrapping the duct tape around the tree. Then, press the tape firmly into the bark cracks and grooves to prevent caterpillars from sneaking past your tape. 

Just like the burlap sack, wrap the tape around chest height. Once the tape is placed, smear the sticky material around the center of the band of tape. If you apply the sticky substances directly to the tree bark, you can potentially disfigure or kill the tree you are trying to protect. 

Periodically check the tape band to ensure it has not become clogged with larvae, insects, dirt, or debris. Apply sticky material as needed, especially after it has rained. 

You can take the barrier bands down around late July after the gypsy moth caterpillars have pupated.

Is Your Tree Dead?

Even though it may look like your tree is dead, that is not always the case. While the damage caused by the gypsy moth may be ugly, it doesn’t make sense for them to kill their hosts. If they eat everything up, the next generation won’t survive- this is why gypsy moths go through cycles of abundance and decline. 

It takes several years of severe defoliation to kill a tree unless the tree has already been affected by other factors such as drought, disease, and poor growing conditions.  

Most trees will actually produce a second set of leaf buds- usually by late July. The second set of leaves provides enough energy for the tree to successfully survive winter. 

Gypsy moth caterpillars seldom feed on conifers such as spruce, pine, fir, and Douglas fir unless levels of gypsy moths are high and the leaves on their preferred hosts have already been eaten.

Unlike deciduous trees, conifer trees have a much higher risk of dying when they are severely defoliated. This is because conifer trees produce buds in late summer and cannot create new leaf buds in time if they are defoliated.

How Nature’s Shade Can Help You Protect Your Trees and Yard

At Nature’s Shade, we can help keep your trees healthy and stable and take measures to protect them from the invasive gypsy moth. 

Let us help you by pruning and removing dead branches and stumps from your property where the adult female moths are most likely to lay their egg mass. You can also turn any leftover debris into woodchips to use for mulch to protect your tree from next year’s infestations and increase soil moisture. 

If your tree has died or the damage is beyond repair, we will work with you to explore all options. Nature’s Shade Tree Care professionals are trained in all things tree removal and will be there to help you from start to finish.

Give us a call today and request a FREE quote.

Categories
Uncategorized

7 Best Trees to Plant in Toronto

Did you know one large tree can provide a day’s supply of oxygen for up to four people? And during one year, a mature tree will absorb more than 22 kg of carbon dioxide from the atmosphere and release oxygen for us to breathe.

I don’t know about you, but that seems like a good reason to plant a tree for us. In case you need just a couple more reasons to find out which are the best trees to plant in Toronto, keep reading below: 

  • Trees can cool a city by up to 10°C by shading our homes and streets and releasing water vapours into the air through evaporation on their leaves.
  • They contribute positively to the natural environment while reducing the carbon footprint.
  • Trees provide essential wildlife habitats. 
  • Office workers with a view of trees report significantly less stress and more job satisfaction. 
  • Trees beautify the property on which they are planted.
  • Homeowners with robust trees stand to increase the valuation of their property.
  • Tree planting can also be an important community-building activity, bringing neighbours and friends together.
  • Children learn the importance of preserving nature and forming a bond with the outdoors when they take part in planting trees themselves and watch them grow. 

These are only a few of the wonderful advantages of planting trees in your yard. Read on to find out the best trees to plant in your backyard and experience the benefits for yourself. 

How to decide which are the best trees to plant in Toronto?

There is a lot to consider before purchasing and planting a tree on your property. Here are some important questions every homeowner should ask themselves before choosing a tree:

  • Do you want the tree to provide shade? 
  • Do you want a fruit tree, ornamental tree, or will any tree do?
  • Will your fruit tree be included in your garden? 
  • How much space do you have for the tree to grow?
  • What are the best trees to grow in the soil in your backyard?
  • What are the strengths and weaknesses of your chosen tree? Will it adapt well to your property?
  • Considering the light conditions of your location, which trees are best suited for your yard?

More often than not, homeowners cannot reach a suitable answer by themselves and need help coming to a final decision. Testing the soil, checking the space, and pairing it with the best trees requires professional tree service for the best results. That’s when owners contact a local tree arborist to assist them in finding and planting the perfect tree for every yard. 

The best and most popular trees for your Toronto backyard

one of the best trees to plant in toronto next to a church

Quite a few native trees grow well in the Toronto climate, but choosing the best tree depends on the key factors we have previously mentioned. Speaking from our years of professional experience as tree doctors, we have compiled a list of the seven best trees for Toronto homeowners to plant in their backyard. 

The listed trees are by no means an exhaustive catalogue- to learn more about the best trees to plant near your home, take a look at this list of native trees in Toronto. 

White Oak

If you want your tree to provide shade, look no further than the white oak. They reach a behemoth height of about 30 meters and easily towers over your household. Planting oak trees near your home is an excellent idea because the robust roots grow deep and can easily live up to 400 years. The heavy branches grow very close to the ground and may sometimes interfere with your property-practice regular pruning to keep the tree tidy and prevent damage to your house or surrounding buildings. 

American Beech

If you are looking to bring a little joy and life into your garden, the American beech trees are a great addition to consider. They grow up to 5-10 meters and provide partial shade to your property. The decorative trees and edible beechnuts will also frequently invite squirrels, birds, and tiny insects to your property and provide a natural sanctuary for the wildlife habitat. 

The American Beech is a blue barked tree with a beautiful oval leaf. They need to be tended to while seeding and only grow into a full-bodied tree in nutrient and moisture-rich soil. 

Blue Beech

The Blue Beech thrives in moist soil, grows up to 22 meters, and gives shade to the property on which it grows. The smooth grey bark of this short tree grows harmoniously alongside the longer oaks, pine, and maples. Don’t be misled by its name, though; they don’t belong to the beech family. Even so, they are one of the best trees for your backyard. 

Sycamore

The sycamores are one of the best shade trees to include on your property. In well-fertilized and moist soil, they tend to grow up to 30 meters and develop dense foliage. They are one of the best trees to plant in your backyard, but make sure you have adequate space to let them spread out. This deciduous tree sheds leaves heavily and constantly during fall, making for more than one mandatory leaf clean-up. 

Sugar Maple

The Sugar Maple tree produces the majestic maple leaf, Canada’s national emblem. Needless to say, the Sugar Maple is one of the best trees to include in your backyard for community purposes. Come fall, the thick foliage displays the vibrant fall colours gloriously. They enhance the beauty of your property, provide shade, grow well in all kinds of soil, and are very easy to maintain in colder climates. However, the population of this tree is declining. Planters are choosing to focus on species that fare better industrially. Help the Sugar Maple thrive again and add one to your property today! 

Kentucky Coffeetree

This native plant of Toronto is also one of the most unique types of trees to consider. Its narrow frame and controlled branching make it an ideal tree to include in a garden, urban forest, or limited spaces. The tree grows very well in any kind of soil, adaptive to various climates, and drought-resistant. The Kentucky Coffeetree is a threatened species in Ontario today, making a solid reason for you to plant this tree often and re-populate it in your backyard.

White Pine

The evergreen white pine grows to its fullest form in wide spaces and adapts to a wide range of soils. It is generally a tough tree, resistant even to fire, but often falls prey to tree-killing fungus. 

White Pines almost always stand out in a larger group, owing to their height and beauty. It is a  low-maintenance tree that provides shelters to squirrels, birds, and other local wildlife. 

Now that you know seven of the best trees to plant in Toronto, you can narrow down your favourites. Local tree professionals will carefully analyze all of your needs and recommend the best trees for your property. Call Nature’s Shade for professional help choosing and planting your next tree today!

Categories
Tree pruning

A Complete Guide to Pruning Trees

Every tree owner is familiar with the word ‘pruning’; after all, it is the most common tree maintenance practice, but that does not mean that every tree owner is familiar with how to prune correctly. Contacting a professional arborist is the perfect way to keep your trees healthy and looking amazing all year long.

Even with professional help, it doesn’t hurt to know at least the basics of tree pruning. In fact, learning the best tree care practices can even help you choose the right arborist for your needs. Keep reading to learn more about the tree pruning process.

Pruning Trees – Why is it important?

Pruning eliminates diseased, unproductive, or unwanted parts of trees that no longer add to the plant’s health. Let’s look at the significant benefits of pruning your trees: 

Protect the people on the property by pruning

  • Pruning helps eliminate low-lying tree branches that can cause injury.
  • Prune damaged or dead branches leftover after a storm subsides.
  • Low hanging branches over households, streets, offices, etc., pose a potential threat to the property and people’s safety. Unless pruned, they can cause significant damage in the future.
  • When trees are allowed to grow freely, they may interfere with overhead wires, power lines, electric circuits and block the visibility of street lamps or traffic lights.

Improve the structure and production of your trees

  • Pruning trees help them to bear new fruits and flowers.
  • Beautify your trees by pruning unseemly branches.
  • Regular tree pruning accelerates the plant growth, helping evergreen trees to increase their lush foliage.
  • Short shrubs maintain and increase their dense hedges when pruned.

Keep the plant healthy

  • Diseased branches infected with fungi need constant pruning to remove and prevent further damage. 
  • Pruning trees is generally the quickest way to get rid of insect infestations. When insect infestations are left unchecked, they eat into the trees and structurally weaken them. Such trees can only be saved by pruning. 
  • Prune hedges and branches that tend to rub together and cause breakage or deformities.
  • Snipping the dense foliage in evergreen trees allows light and air to enter through the canopy, promoting healthy, disease-free growth.
  • Standing water or prolonged snow cover can dampen the base of your tree, resulting in the weakening of the wood structure, and may even induce rot. The best time to prune these trees is as soon as you notice any degradation.
  • Pruning helps strengthen the trees and allows them to stand tall in wind, storms, and inclement weather.
  • Older trees especially need to be pruned to help maintain stability and health. 
  • A newly planted tree should be pruned appropriately during their early years to promote growth in the most vital parts.

Take Note: When you prune many tree branches from a single tree, it may encourage weaker branches to grow. Weak limbs affect the overall plant health, stability and strength of the tree, making tree topping highly discouraged.

When is the best time to prune trees and shrubs? 

well pruned tree looking good and healthy

Every season affects trees differently:

  • Spring growth brings in a new bloom of flowers and fruit.
  • Leaves and branches dry up in summer. 
  • Trees are more prone to fungi attacks during fall.
  • Arboreal productivity is almost always dormant during winter.

Hence, it’s necessary to identify the effects of each season beforehand, allowing tree owners to:

  • Observe the tree’s growth and preserve its health.
  • Prepare flowering trees for a productive season.
  • Control and shape the tree’s structure as it grows.
  • Keep fungal infection at bay.

After fall, the tree is laid bare to identify which parts need pruning. It may be tempting to prune trees as early as autumn, but that can cause potential damage. Trees prepare for hibernation through the winter months by shedding off their load in autumn. 

Moreover, when the air is neither too chilly nor too warm, a fungal attack can materialize on pruned stubs. Leave the tree alone during this time to allow the tree to heal slowly and recover from last season’s pruning. 

The best time to prune branches is in the dormant season from late winter to early spring. Late winter cuts leave the young tree less exposed to climatic elements since new growth arrives in spring and the tree heals slowly. Pruning trees in late spring is suitable for stimulating growth in old and mature trees. 

Not all plants have the same pruning pattern. When the motive is to bear flowers and fruits, tree pruning practices are quite different from pruning small trees, shrubs, hedges and evergreens. 

Best tools for Pruning Trees

Basic pruning can be performed with the simplest of shears or pruning saws. Sharp and clean cuts ensure quick healing and healthy growth, while blunt cuts made by dull tools are highly detrimental to new development in trees. Hence, it’s essential to keep your tools sharp, clean, and well-oiled. 

Choosing the right pruning tools for the job 

Essential tools needed for pruning:

  • Pruning Shears – Basic pruning equipment that gets the job done. They are capable of cutting thin branches of about 20 mm in diameter. Depending on the job at hand and the user’s preference, pruning shears have three variants: 
  1. Bypass Pruner – The most popular hand pruner. It has a curved blade and cuts like scissors, leaving clean cuts.
  2. Anvil Pruner – Has a straight blade and acts like a knife on a chopping board. They help remove dead branches and stems. 
  3. Ratchet Pruner – It is an essential pruner that can make 25 mm cuts easily. They help prevent strained wrists while cutting through dense branches.
  • Lopping Shear – With long handles and thick blades, they help prune fruit trees and vines, cutting branches about 40 mm thick.
  • Hedge Shear – Useful for pruning shrubs and hedges and can trim 10 mm thick branches. 
  • Pruning Saws – Depending on the thickness of the wood, saws are capable of easily cutting 25 – 125 mm thick branches. The common variants are: 
  1. Hand Saw – A versatile and portable saw that can easily prune 25 mm thick branches.
  2. Pole Saw – Their long handles help reach inaccessible places and can cut larger branches, up to 30 mm thick branches. 

How to maintain pruning tools 

  • Clean the blades after every use.
  • Store them in a dry and safe environment; otherwise, the humidity helps induce rust in the blades in no time.
  • Ensure that sap and dust doesn’t build up between the blades.
  • Oil and sharpen the blades periodically.

How to prune a tree properly 

Depending on the type of tree, you can prune trees in a myriad of ways, but these general practices will help with pruning trees of any kind: 

  • The general rule of thumb is to never remove more than 25% of tree or shrub foliage.
  • Avoid cutting into the branch collar or close to the trunk to prevent damaging the tree. 
  • Always remove diseased, dying, dislocated, and dead branches.
  • Ensure wound closure by painting over it.
  • Clear away at least some of the entangled or rubbing branches at the base of the tree or shrub.

If tree branches and limbs appear to be bigger in diameter than the trunk, always prune them; otherwise, those branches can cause structural instability.

Eliminate branches that appear to have a downward growth.

Types of Pruning

Pruning trees solve various concerns, from health to security-related reasons. There is no one-cut-fits-all procedure, but depending on the issue at hand, these are the basic types of pruning:

  • Thinning – The practice of snipping away the branches and leaves of a tree allows light and air to pass through the tree uninhibited. Thinning from time to time also helps to lessen the load of foliage resting on thick branches while keeping the tree’s natural shape.
  • Topping – Clears away most of the tree branches and foliage, stripping it down to the bare structure. Not always recommended; this helps shape the growth in new plants.
  • Raising – Refers to the practice of clearing branches that grow low and disrupt human activity. 
  • Reduction – The term is self-explanatory; it means reducing the tree foliage or shrub volume by trimming. The reduction also helps to maintain the form and structure of trees. It is typically done as a safety precaution, such as to make way for power lines. 
  • Cleaning – Removes the damaged, diseased, weak, and dead or dying branches from a tree crown.

When to call your local tree pruning professionals

  • If you are completely inexperienced and don’t know how to prune a tree correctly, it’s imperative to utilize the services of a professional arborist.
  • For safety reasons, only professionals should clear the wreckage left behind in the aftermath of a storm.
  • Safely keep the area around power lines and poles clean.
  • When crowning branches are extremely low hanging.
  • When there is a heavy workload or when sophisticated power tools are necessary to do the work.
  • When a pruning region is far out of reach.
Categories
Tree and Shrub pruning

Top 5 Do’s and Dont’s About Shrub Pruning (2021 Edition)

Pruning is a productive way to bring back life to troubled plants and make them happy and green all over again. 

Basically, shrubs with unproductive parts are pruned to promote growth and vitality. Undoubtedly it is an essential trick for home gardeners, landscape gardeners, lawn decorators, and so forth, you get the gist. 

These key pruning practices will keep your bush lush and vibrant. Couple them with mandatory tree care resolutions and you won’t have to worry about your shrubs again.

Shrub pruning: shaping the plant with one perfect snip at a time

Shrub pruning is an important tool in gardening as it limits the available energy to the viable buds, leaves, and branches; this will aid the plant to develop at the peak of the blooming season.  

If you really want to see your garden turn into a work of art, consider giving us a call. Else, if you feel like taking matters into your own hands, read on to know how you can keep your greens lively. 

Find the limbs which need trimming, place the cuts in tactical positions so that strong branches have the capacity to bloom and bear fruits. The key pruning idea is to trim the untidy shrub at the right time, in a manner that cleans up the plant visually and helps it grow. 

MUST DO:
Maintain a proper toolbox for gardening. Dull edges can damage stems or branches. 

Trim a messy looking stub and revive growth by pruning the shrub

Shoddy gardening work results in a messy garden and weak plant growth as well, in case you were wondering. 

DO:
To undo badly chopped shrub stumps, make a sharp cut at an angle of 45 degrees in the direction you want the bud to take growth. However, be utterly sure that you use a sharp tool to make the cut, or else you’ll end up with a shoddily chopped stub yourself. The key pruning technique here is to make a clean chop in a manner such that the lowest point of the cut and the bud are farthest from each other.

DON’T: 
Never snip at any other angle than 45 degrees, this will make an uneven cut and expose a large surface area to the elements. Additionally, avoid making a cut that leaves more than ¼ inch above the bud, or else the shrub will catch rot. These fatal mistakes will make a plant grow and heal slowly. 

If you have a nagging doubt that your tree is sick, lookout for these signs

Thinning Cuts: Blow life into lifeless branches

DO:
The key identifiers to look out for while shrub pruning is the branches that can reproduce new growth. Make the best of thinning cuts to eliminate tangles and dried-up branches. Clear away the dense foliage and supplementary growth to let air and light dance in the open heart of the plant. Best to use electric shears or clean and sharp manual pruners to get the job done. 

DON’T:
You can trim up to 1/3rd of the total structure of the plant. So, don’t just prune off old branches randomly. Make cuts only after observing the weak links and identifying the major healthy stems.

For seasonal plants like Rose Lilac etc, thinning cuts need to be timed accurately. Shrub pruning is an efficient trick to bring growth into flowering plants. For plants like Rose, pruning should be done by early winter to have flowers in late spring. 

Steady a lopsided shrub with the key pruning techniques

DO:
Heading cuts shorten a branch, and allows you to impel new and healthy growth in any direction you want. Now to do that, you need to do prune the shorter side of the lopsided shrub. Though it seems anti-climactic, this is a key pruning strategy to bring balance to the shrub. 

Use a sharp pruning tool to remove the part of the stem, slightly above the bud to stimulate growth in your favored direction. 

DON’T:
A single cut must not reduce the length by more than 1/4th of the total foliage. No matter how tempted you are to snip it all away, try to use thinning cuts along with heading cuts and remove older woods.

If you follow the procedure, the main stem gets proper sustenance which in turn will drive growth in potential branches. Now you know how to mold the growth of your indoor plant.  

Rejuvenate old, tangled, and woody shrubs

The remedy to woody stems is simple, you have to allow new stems to come out and get rid of the old branches. How to do that?

DO: 
Start chopping the old and woody stems from the base and make your way to the center. The next year, as new branches substitute the older ones, it’s time to trim off the remainder. It takes usually two years to three years to remove all old woods and rejuvenate the plant when you follow the proper guide to shrub pruning. 

DON’T:
As we have mentioned before, never try and trim more than 1/3rd of the plant’s mass. This is done to ensure that the plant has enough healthy branches to photosynthesize and survive the year. 

The key pruning idea here is, don’t try to rush. The whole process is gradual and every cut has to be given a year to develop. 

Helping evergreen flowering plants bloom along the sides

Evergreen plants need some extra love and care, after all, they will be around when others won’t. For twiggy flowering plants, pruning the terminal ends by nipping off the buds promotes tertiary growth, and the shrub branches out in the sides. Couple this with heading cuts and make the plant grow in any direction you want. 

DO’S: 
Remove the terminal leaf buds by pinching to allow an undeveloped bud below to blossom. This is how you encourage lush branching. For evergreen flowering plants, this is the right way to control the overall shape and size of the shrub.

DON’T:
When you are trying to make flowers bloom, be very careful and don’t pinch away the flower buds in the process. In case you don’t know, they are the lush and bigger looking ones perched at the tip of the branches. 

Categories
Uncategorized

7 Reasons To Love Your Evergreen Trees

In the tree world, there are many fabulous types to consider. And while oak trees and apple trees all have their gifts, evergreen trees are a perennial favorite. These trees never lose their needles, and thus are a true constant. If you’re not sure why you should love your evergreen trees, we’ve got a few ideas for you.

1. Green All-year

Winter definitely has its advantages but after some time, the season can start to really drag on. Even newly fallen snow can only make the area look lively for so long. At the end of the day, winter can feel like a barren landscape.

The one constant bright spot of winter, however, is the inclusion of evergreen trees. As other deciduous trees all lose their leaves, evergreen trees hold onto theirs, allowing us the chance to always see green.

Without evergreen trees, there would be no green in winter, and that is not a pleasant idea. You don’t even need to have a lot of evergreen trees in your yard to make a difference. A few in the front and a few in the back can make a big impact. It’s also nice if there is an evergreen tree in view of well-frequented areas, such as the living room and the kitchen. This way you can look out a window and be reminded that life still exists outside.

2. Wind Breakers

Evergreen trees are a great way to stop the wind from wreaking havoc on yourself and your home. While cold days can be felt inside your home, windy days make that cold felt even more. Evergreen trees, and their strong, full branches, can protect that wind from entering your home year-round.

These trees offer a layer of protection to your home. As a result, it won’t get as cold inside and that means less money spent on your heating costs.

3. Shade Makers

While evergreen trees provide extra warmth in the winter, they actually provide extra coolness in the summer. This is because evergreen trees provide a lot of shade. As they are usually quite tall trees, they can really cover the whole house in shade.

More shade around your home means cooler temperatures inside. Not only is this more comfortable but it also means your air conditioning costs can take a bit of a break.

4. Clean the Air

Interestingly, evergreen trees go dormant in the winter, meaning they don’t produce oxygen through photosynthesis. However, when they wake up in the spring, evergreen trees can start producing oxygen right away.

Deciduous trees, on the other hand, only produce oxygen once their leaves have grown, which doesn’t happen until late spring. They need to wait for the tree buds to start growing and develop into leaves. Meanwhile, evergreen trees never lose their needles so they don’t need to wait for new growth to start the oxygen process.

You will end up breathing clearer air with evergreen trees on your property.

5. Habitat for Animals

Your home is where you live, but your yard is where animals live. Why not give them a bit of sanctuary with some evergreen trees?

Other types of trees will lose their leaves, and exposed branches are no place for birds to stay safe. Instead, evergreen trees offer birds and other animals a chance to stay in a safe, warm place.

Furthermore, the berries and cones that evergreen trees produce are a much needed source of food, especially in the winter.

Critters are our friends, and having a few evergreen trees in your yard means they will be as warm and snug as you are in your home.

6. Privacy

If you move into a house in the summer you might start with a perception that you live in a very private area. But come winter, that privacy can start to diminish, leaving your house, and everything that happens in it, quite exposed.

Deciduous trees, or those types that lose their leaves in the winter, are very different throughout the year. A maple tree can be full and bushy in summer, but completely bare in the winter. As such, while you may get to experience privacy for half the year, the rest of the year can be quite revealing.

With evergreen trees, you get the same amount of privacy year-round. No matter what season you move into your home, you can count on the same amount of privacy if your yard is full of evergreen trees.

7. Different depths

While we might automatically think of towering pine trees when it comes to evergreen trees, the reality is that there are many varieties that come in both different colors and different heights. The abundance of choice will really make you love your evergreen trees.

You can choose cedar trees to make a border between you and your neighbors, which can be more attractive than a simple fence. Cedars also help create borders, such as down the driveway.

Boxwood plants are an excellent evergreen that creates borders and is easy to manicure. Create a dynamic path with a boxwood, clipped as low or high as you would like.

If you’re looking for a bit of whimsy in your yard, consider yew trees. They grow to be 5 to 10 feet tall and are easy to shear. You can get quite creative in what shapes you want, making them a real focal point of any garden.

Finally, there’s something really majestic about spruce trees, that can tower up to 60 feet tall. Knowing that there was once a spruce forest in your area, before the land was cleared for houses, makes you feel a real part of the history of the area.

Categories
Uncategorized

5 Tree Care Resolutions

A new year means a new you. But what about other parts of your life? Even though it’s winter, now is the perfect time to start thinking about your yard and make some important tree care resolutions. Not sure where to start? We’ve got you covered.

1. Take better care of your tools

So often we start the year off right, carefully putting yard care tools away. And then at some point in the year, it becomes a bit tiring and they’re left haphazardly all over the place. Start the year right by organizing your tools.

Select a designated space for all your tree care tools. Make sure it is somewhere accessible and most importantly dry and not exposed to the elements.

Inspect your tools. Clean off any rust and take items like pruning sheers in to be sharpened. Designate a day every month to inspect your tools and tidy them up if need be. Once this becomes a habit, it will be easier to take care of all your tools, which means they will last for much longer.

2. Make a schedule for the entire year

So often we live in one season and become a bit surprised when it changes to the next one. We can be comfortable in our homes, allowing the snow to fall, and then when spring hits we’re suddenly unprepared for the tree care tasks that are upcoming.

Take some time to think about the entire year and make a list of what needs to be done for each season.

Some examples include:

  • SPRING – inspect for winter damage, plant new trees, fertilize
  • SUMMER – mulch, create a watering schedule
  • FALL – trim branches, add winter mulch
  • WINTER – prune trees, wrap specific trees against cold

When creating a tree care schedule, think about external factors such as your own vacation time and how often you are able to get out in your yard to work on it. Also take into consideration the unique climate of where you live as this will determine what needs to happen when.

3. Create a tree care budget

Proper tree care takes money. However, with proper planning, you can end up spending a lot less. Start by thinking about big projects you want to take on in your yard. This could be a big landscaping project, taking down the old tree house, planting new trees, or removing trees.

It’s important to think about projects you can envision for the next five years. If you have kids that are growing up, they might want to play in the tree house for another year, but that could change real soon. Likewise, you may have trees that are providing a nice mix of shade at the moment, but in just a few years they can become too bushy or too tall, creating more shade than you wish.

Once you have a five-year plan, start assigning costs to each project. Ask neighbors, check the internet, or call a tree care company to get rough estimates.

After the bigger items are listed, start thinking about yearly costs. These include annual tree trimming, planting seeds, buying fertilizer, new trees and plants, and any new tools.

Finally, set aside money in your budget for emergencies such as winter storms and broken branches. When all the numbers have been crunched, you will have a good idea of how much to save each year so you can stick to your five-year budget and have the yard you’ve always dreamed of.

4. Only hire professionals

We’ve all been there before. You need a tree trimmed but don’t want to pay for a professional. So, you hire a cheaper alternative with unsurprisingly disastrous results. Then, you need to end up paying again to have a professional fix the mistake.

Tree care professionals are experienced and knowledgeable. They know how to do things the right way and they stand by their results. It can be tempting to cut corners but you will regret it in the end.

This is why making a tree care budget is so important. If you know how much you will need to spend each year on your trees and the rest of your yard, then it won’t be a surprise when it comes time hiring a tree care professional.

5. Learn more about the trees on your property

Our last recommendation for tree care resolutions is kind of a fun one. Take the time to learn more about the trees on your property. Most people move into a house that already has tree growing around them. And too often, we have no idea what they actually are.

There are many ways to figure out what types of trees you have. You can take pictures or even clippings of the branches and head to your local gardening store. You can also download apps that will identify the trees for you.

Once you know what kind of trees you have, you can take much better care of them. You might find that you have a tree that is drought-tolerant, and therefore don’t have to worry about always watering it. Or, you might find that a tree needs even more water than you’re already giving it.

Knowing the types of trees you own means you will also know what their future will hold. Perhaps you have a tree that looks kind of young. However, you may find that it grows to be way bigger than imagined, and at a very quick pace. In this case, you can really plan for the future and move it to a more suitable location.

Knowing more about your trees is always a good thing, so make this an activity for the whole family. The world of trees is pretty fun once you start getting to know it.

Categories
Uncategorized

5 Common Winter Tree Care Issues

Winter can be a stressful time for trees. The extreme weather can cause all sorts of issues and it’s important to be prepared for them and know how to react. The more you know about winter tree care issues, the better able you will be to keep your trees healthy year-round.

Animal Damage

While some animals hibernate during winter, there are still plenty of animals that are active. And those active animals need to find a suitable habitat and most importantly, a food source.

During winter, food sources are naturally scarce for animals. There are no nuts available and most plants no longer have seeds or berries. While most animals are adaptable, when there is heavy snow on the ground, animals can have a hard time accessing the remaining leaves and grasses.

The result is that many animals, including mice and rabbits, will start feeding on bark. The resulting damage that is done is called girdling. Trees need their bark to protect the inner wood, especially in winter when there are extreme temperatures. Too much girdling and a tree could possibly be weakened beyond repair.

Thankfully, there is an easy to way to prevent animal damage to your tree. Before heavy snows, wrap your tree trunks with metal mesh. This will deter the animals from eating the bark.

Frost Heaving

When temperatures plummet, and especially when there is little moisture in the air, frost occurs. When this happens, the dirt around your trees actually moves. Roots in the ground are pushed upwards, which is known as frost heaving, and has two major consequences.

The first is a practical result. Trees that grow next to pathways and sidewalks can have their roots pushed up so that they move the surface above them. This damages the pathways and sidewalks. Not only will you have to remedy the situation in the future, but in the meantime this is a major tripping hazard.

The second consequence refers to the tree roots themselves. As the roots are pushed upwards, they undergo a lot of strain. They can end up breaking or splintering, thus depriving the tree of important nutrients.

The best way to prevent frost heaving is by adding a thick layer of mulch around the base of the tree. Mulch is a great insulator and will protect the soil below from frost. Just don’t place mulch right next to the tree trunk as it can lead to mold growth. At Nature’s Shade Tree Care, we provide mulch deliveries

Sunscald

While humans need to be really cautious about the sun’s rays in summer, trees need to be extra cautious in winter. Sunscald is similar to a sunburn, but for trees. In winter months, clear skies and bright sunshine can actually be quite warm. However, when this heat is suddenly removed, as thick clouds develop, a tree can’t regulate itself.

As a result, the inner wood of a tree can develop thick cracks in it. The tree’s cells that were activated by the heat aren’t able to adjust quickly enough to the absence of it, which is when damage occurs.

The only positive with this winter tree care issue is that sunscald is more common in southern locations. If you live in a southern region, be sure to wrap delicate trees to give them an extra layer from all the elements.

Snow and Ice Breakage

Winter storms are one of the major causes of winter tree care issues. Snow, ice, and wind can all create high levels of damage. While some issues can wait for spring, many of them need to be dealt with right away.

Large amounts of snow that accumulate quickly can be too much for tree branches to bear. While trees naturally bend under pressure, even they have their limits. While you certainly don’t need to shake your trees every time it snows, as this actually provides a layer of insulation, you might want to remove the snow if it is a large amount.

In some climate areas, freezing rain and ice storms are an issue. In this case, the temperature starts out above zero with rain falling, only to quickly drop to below freezing. The result is trees encased in ice. If this lasts for more than a few days, the ice can do real damage.

The extra weight of ice surrounding the whole tree can cause branches to break and limbs to fall. Furthermore, ice can cut off nutrient supplies to your tree, causing it to become quite weak.

Unfortunately, when an ice storm happens, there isn’t a lot you can do. Trying to chip away at the ice can cause more damage to the bark. It may take some time, but you have to just let the ice melt away naturally and hope there wasn’t too much damage caused. Just make sure you perform a thorough inspection after an ice storm to see if any branches are at risk of falling down.

If you live in a region that regularly has ice storms, there is a way to prepare for them. Tie branches of trees together in a loose fashion. You can use coated twine or strips of fabric. One spring comes around, you can untie the fabric.

Tree Drought

While we often think of massive snowdrifts in winter, the reality is that many regions experience a cold, dry winter. This is especially true at the beginning of winter. When the ground freezes, the water source of many trees also dries up. As a result, trees actually enter a state of starvation. If this lasts too long, permanent damage can be done.

Be sure to monitor your weather in winter. If there has been no precipitation for a few weeks, give your trees a good drink of water. They need a lot, in small amounts. You may have to water your tree every hour for a day or two in order for the roots to properly reach the ground water.